
Spy Kit for Kids
CALLING ALL AGENTS:
Now that you’ve aced the code wheel method from the last mission, let’s learn another style of clandestine messaging! Morse Code is another way to send secret messages. It was created by American artist and inventor Samuel F. B. Morse. This code uses a series of durations (called dots and dashes) for each letter in the alphabet. He was also the inventor of the telegraph! Talk about paving the way for text messaging.
Follow along on how to make a pair of Morse Code transmitters! This is a great Morse Code STEM activity for kids, you’ll have fun making the device too.

Spy Kit Materials:
You’ll need the unassembled Morse Code transmitter, glue circles, and a plastic tab. The tab is in the envelope, it’s clear so may be overlooked, but it’s there! I particularly love this activity because the transmitter is all in one piece, easy and fun!

How to Create the Morse Code Transmitter:
1. Minimal prep work for this craft! Remove the perforated pieces in the slotted circle. They pop off very easily.

2. Flip the unfolded transmitter so that the code chart is on the back and you are seeing the side that reads, “Slide PCV Strip into Slit.” Place plastic tab as instructed. The tab only needs to go as far as the creased line. The tab will act a spring.

3. Fold the bottom section of the transmitter up. You should now see the Morse Code Chart and it will cover the plastic tab.

4. Keep this folded while flipping the entire transmitter over. You’ll see the plastic tab sticking up from the top. Take the section above it and fold it down. (We are essentially wrapping the transmitter sections around the tab.) You’ll know you’ve done this right if you see the printed black and white circle surface.
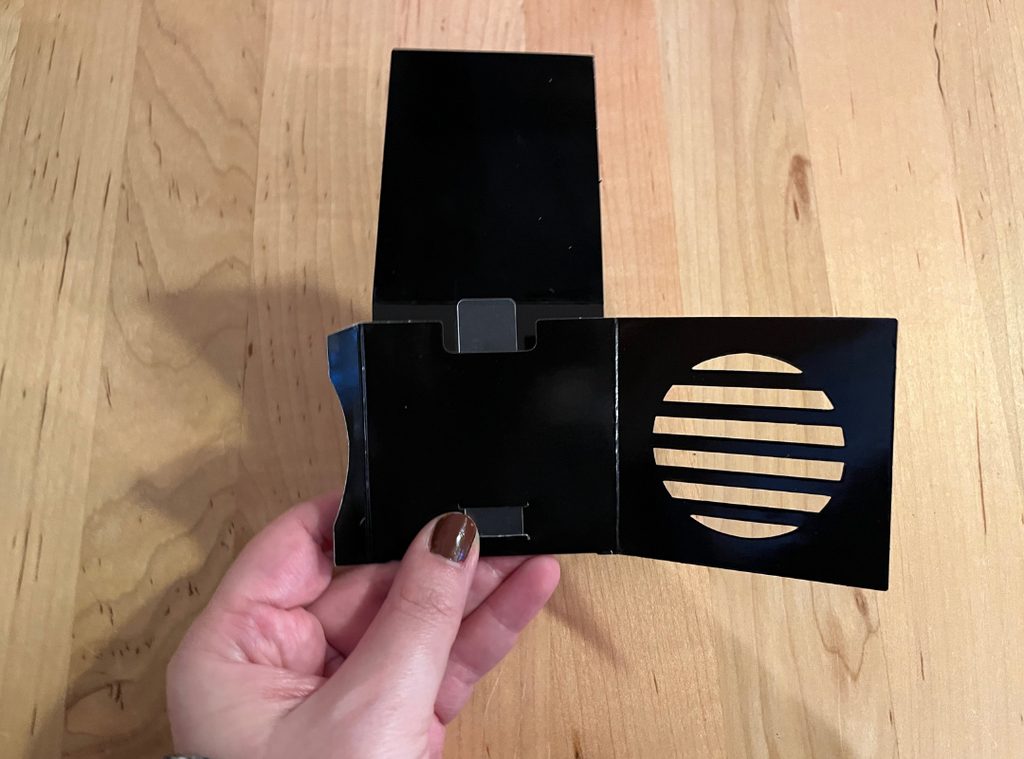

5. Do you see the small curved edge sticking out from the left of the printed circle? Let’s glue that down using the glue dots!

6. Time to glue the slitted circle over the printed circle. You’ll want to match the circles together so the circle seems to be blacked out. Try to cover as much white space as possible. HINT: Place the glue dots on the folded edge first, then fold the slotted circle over it.

How Does the Transmitter Work?
The transmitter will open and close like blinds when squeezed. Use the Morse Code chart by squeezing down and back up quickly for dots and longer for dashers. Your secret agent partner will see the flashes of white from across the room and will decode your message!

What is the best Spy Kit?
To solve more Top Secret missions, check out the Spy Kit from Learn & Climb! There are 55 TOTAL activities! Invite some friends over and practice sending secret messages. Engage in this STEM activity and more!

